Feb, 2016
How to Migrate from ZenCache (Lite) to Comet Cache (Lite)
Table of Contents
- Step-by-Step: Migrating from ZenCache to Comet Cache
- Frequently Asked Questions
- I already have ZenCache installed; how do I install Comet Cache?
- Will my old ZenCache settings carry over to Comet Cache?
- Can I delete ZenCache?
- If I had plugins/themes that were customized to integrate with ZenCache, will those customizations still work with Comet Cache?
- How do I install Comet Cache if I already have ZenCache installed?
- I received a Fatal Error while migrating; help!
- Getting Help with Other Issues
When installing the Comet Cache plugin, Comet Cache will automatically detect and preserve any existing ZenCache settings. Once Comet Cache has been activated, ZenCache will be deactivated. All of this happens automatically; all you need to do is install the Comet Cache plugin.
See also: Announcing Comet Cache™ (formerly ZenCache).
Step-by-Step: Migrating from ZenCache to Comet Cache
There are two ways to install Comet Cache:
Installing Comet Cache via the WordPress Dashboard
- Deactivate ZenCache by logging into your WordPress Dashboard and going to WordPress Dashboard → Plugins. Locate the existing ZenCache plugin in the list and click 'Deactivate'.
- Visit WordPress Dashboard → Plugins → Add New in the sidebar and then search the Plugin Repository for "Comet Cache".
- Click the "Install Now" button for the Comet Cache plugin; it should be at the top of the search results.
- Click the "Activate Now" link when Comet Cache finishes downloading
- (Optional Step) Now that you've deactivated the ZenCache plugin, you can also Delete it, as there is no need to have both ZenCache and Comet Cache installed.
Installing Comet Cache via Downloaded Zip File
- Deactivate ZenCache by logging into your WordPress Dashboard and going to WordPress Dashboard → Plugins. Locate the existing ZenCache plugin in the list and click 'Deactivate'.
- Download the Comet Cache plugin from WordPress.org or from cometcache.com
- Log in to your WordPress Dashboard and Visit WordPress Dashboard → Plugins → Add New
- Click the
Upload Pluginbutton - (Optional Step) Now that you've deactivated the ZenCache plugin, you can also Delete it, as there is no need to have both ZenCache and Comet Cache installed.
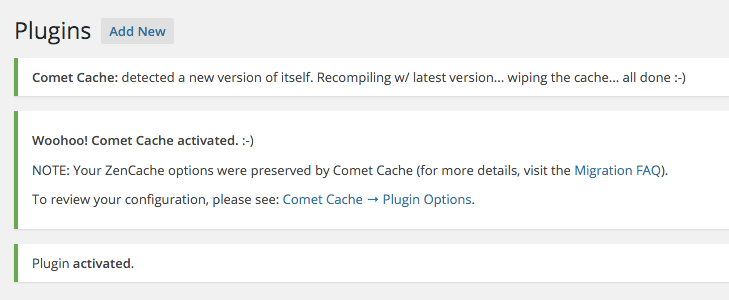
That's it! If you had ZenCache installed prior to installing Comet Cache, you should see a migration message like the one below:
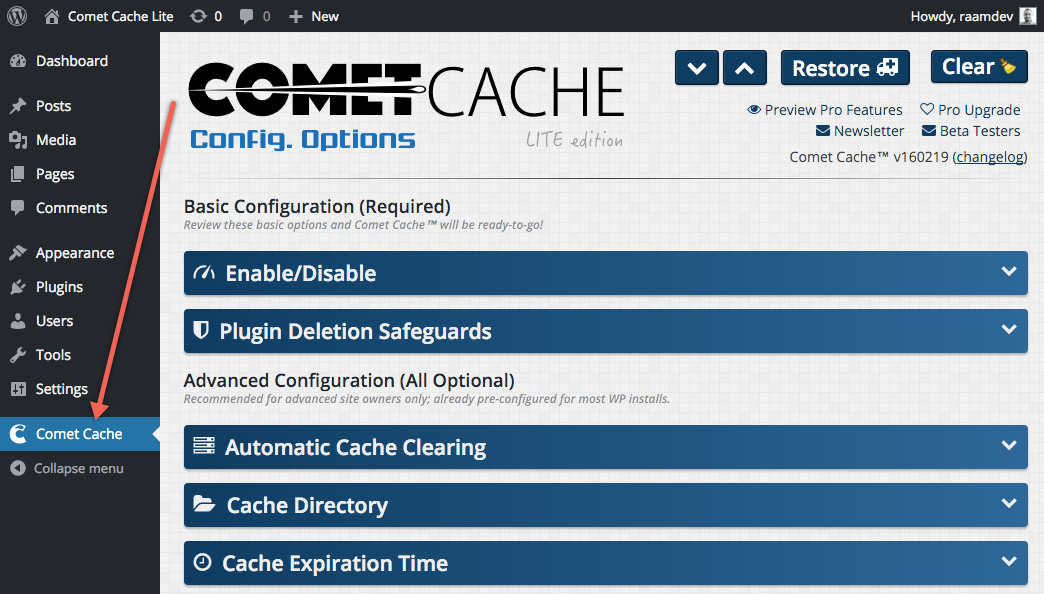
You'll also now see a new "Comet Cache" icon in the WordPress Dashboard Sidebar:
Frequently Asked Questions
I already have ZenCache installed; how do I install Comet Cache?
Deactivate the ZenCache plugin and then install Comet Cache. The Comet Cache installation routine will automatically detect ZenCache and then migrate over your ZenCache settings. Please see the full tutorial above under How to Migrate from ZenCache to Comet Cache.
Will my old ZenCache settings carry over to Comet Cache?
Yes. If you had ZenCache installed prior to installing Comet Cache, all of your ZenCache configuration options will be picked-up by Comet Cache automatically.
Can I delete ZenCache?
If you have any custom ZenCache settings that you want Comet Cache to import, then you can leave ZenCache installed (but deactivated) until after you install Comet Cache. When Comet Cache is installed, it will look for any existing ZenCache plugin settings and copy those over to Comet Cache.
Once Comet Cache has been installed, you can delete the ZenCache plugin.
If I had plugins/themes that were customized to integrate with ZenCache, will those customizations still work with Comet Cache?
Most likely, yes. We have built Comet Cache to be backwards-compatible with ZenCache so if you were using $GLOBALS['zencache'] or using the ZENCACHE_ALLOWED constant, these will still work with Comet Cache.
How do I install Comet Cache if I already have ZenCache installed?
If ZenCache is currently active, deactivate the ZenCache plugin in WordPress Dashboard → Plugins. After you have deactivated ZenCache, you can donwload and install Comet Cache. Comet Cache will automatically detect and preserve your existing ZenCache settings. Once Comet Cache has been activated, ZenCache can be deleted.
I received a Fatal Error while migrating; help!
If the error is preventing you from accessing your WordPress Admin Dashboard, start over from scratch by following these manual uninstallation instructions for both ZenCache and Comet Cache. Once that's done, you can follow the Comet Cache Lite installation instructions.
If the fatal error is not preventing you from accessing your WordPress Admin Dashboard, and you're seeing the fatal error while activating Comet Cache or removing ZenCache, see the following section.
Fatal Error While Activating Comet Cache or Removing ZenCache
If you can still access your WordPress Dashboard and you're receiving a fatal error message while activating Comet Cache or removing ZenCache, follow these steps:
- In WordPress Dashboard → Plugins, make sure that both ZenCache and Comet Cache are deactivated
- In WordPress Dashboard → Plugins, activate ZenCache
- In WordPress Dashboard → ZenCache → Plugin Deletion Safeguards, make sure "Yes, uninstall (completely erase)" is selected and then click "Save All Changes" at the very bottom of the page.
- In WordPress Dashboard → Plugins, deactivate ZenCache
- In WordPress Dashboard → Plugins, delete ZenCache
Now you should be able to activate Comet Cache without issue. If you continue to see a Fatal Error, follow these manual uninstallation instructions for both ZenCache and Comet Cache, and then try reinstalling Comet Cache.
Getting Help with Other Issues
If after following all of the steps above, and reading over each of the FAQs, you find yourself with an issue that requires assistance, please start a new thread on the Comet Cache Community Forum.


One Comment on "How to Migrate from ZenCache (Lite) to Comet Cache (Lite)"
Pingback: 6 Best Caching Plugins for Your WordPress Site