Feb, 2016
How do I setup Static CDN Filters with CDN77?
CDN77 is an alternative to Amazon CloudFront and MaxCDN that can be integrated with Comet Cache Pro through the Static CDN Filters. To integrate Comet Cache with CDN77, you'll need to create an "HTTP CDN Resource" inside your CDN77 account and then supply Comet Cache Pro with the "CDN URL" provided by CDN77.
Step-by-Step: Integrating Comet Cache Pro with CDN77
Login to your CDN77 account and create a new CDN Resource. (If you already have a CDN77 account, visit CDN → New CDN Resource to create a new CDN resource for your site.) Select "HTTP Standard" for the resource type.
In the General Settings, enter your domain in the Origin field, exactly as it appears on your site. If you use http://www.example.com, you should enter
www.example.com. If you use http://example.com, you should enterexample.com. Note that CDN77 requires that you fill in the CNAMEs field, even if you're not going to use that feature (not required by Comet Cache Pro). If you're not going to setup a CNAME, you can just addcdn.to the front of your domain in that field, as shown in the screenshot below.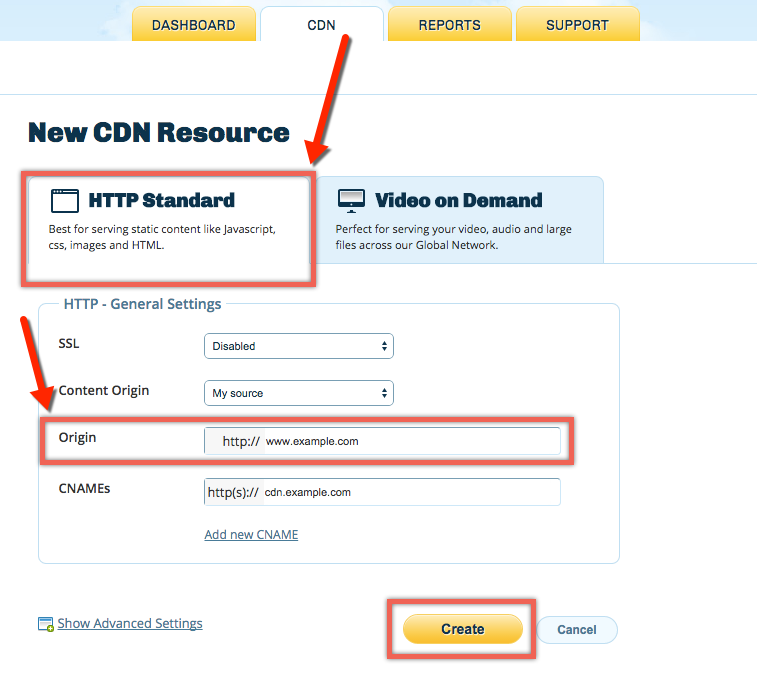
Once the resource has been created, you'll want to visit the Settings tab and make sure that Ignore Query String is set to
Disabled. This is the default when creating a new Resource on CDN77, but it's a good idea to double-check, as this must be disabled for Comet Cache Pro to work properly.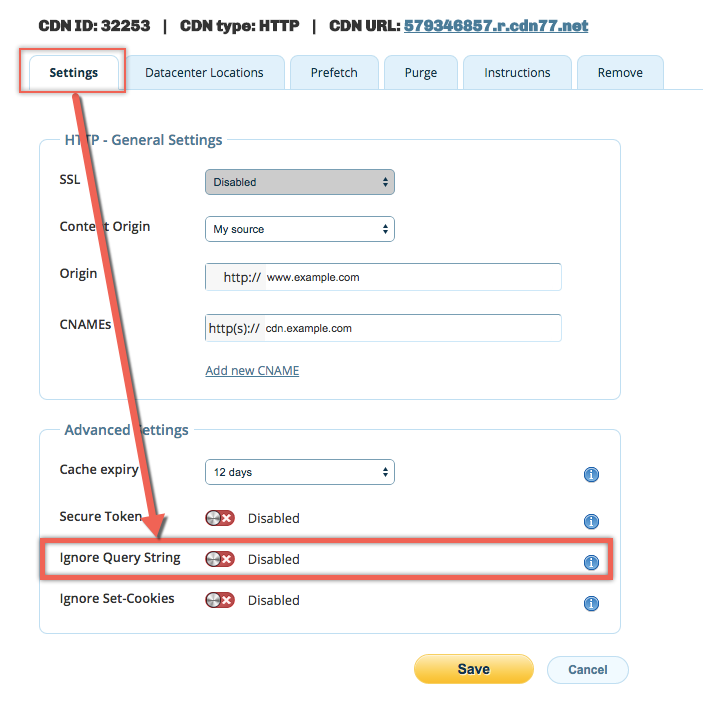
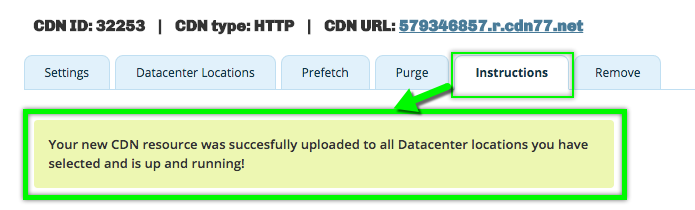
Now we need to wait for CDN77 to finish provisioning the new resource. You'll see a message on the Instructions tab that tells you it will take 10 - 15 minutes to finish. When that message changes to "You CDN resource was successfully uploaded to all Datacenter locations", you can proceed with configuring Comet Cache Pro.
Important: You must wait until CDN77 has finished provisioning the CDN resource before you use it with Comet Cache Pro, otherwise you may end up with broken links on your site.

After 10 - 15 minutes, you can refresh the page and you should see the message has changed to the following. Now we're ready to configure Comet Cache Pro.
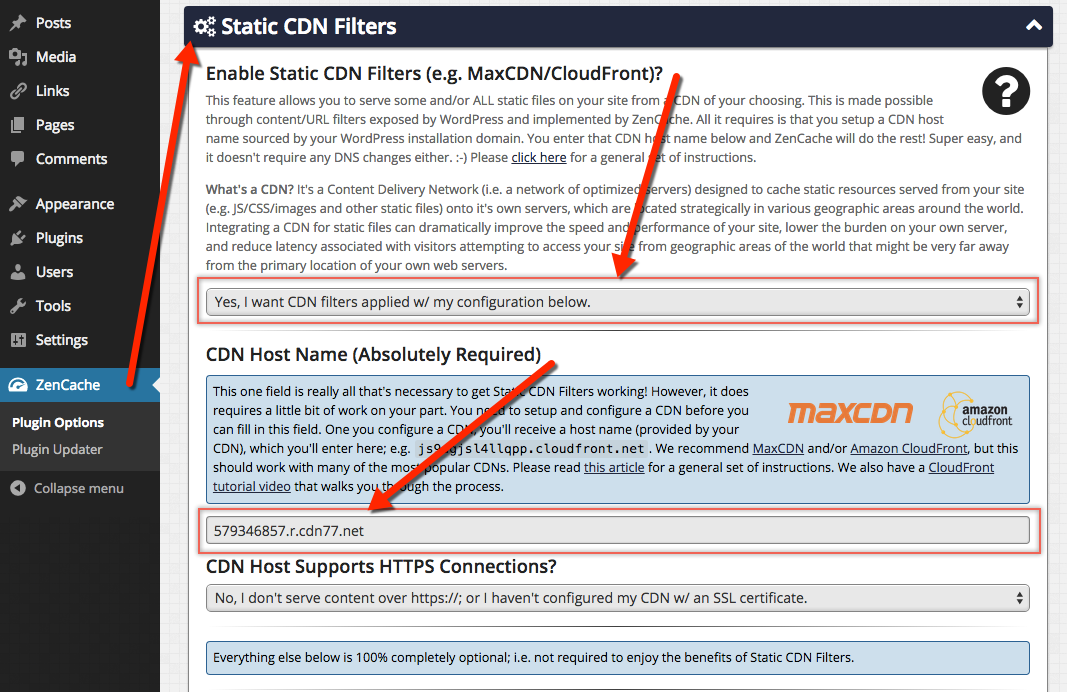
Copy the CDN URL for the new CDN resource that you just created (it should look something like
579346857.r.cdn77.net) and paste that into the CDN Hostname field in WordPress Dashboard → Comet Cache → Plugin Options → Static CDN Filters. You'll also want to make sure Static CDN Filters is enabled and set to "Yes, I want CDN filters applied".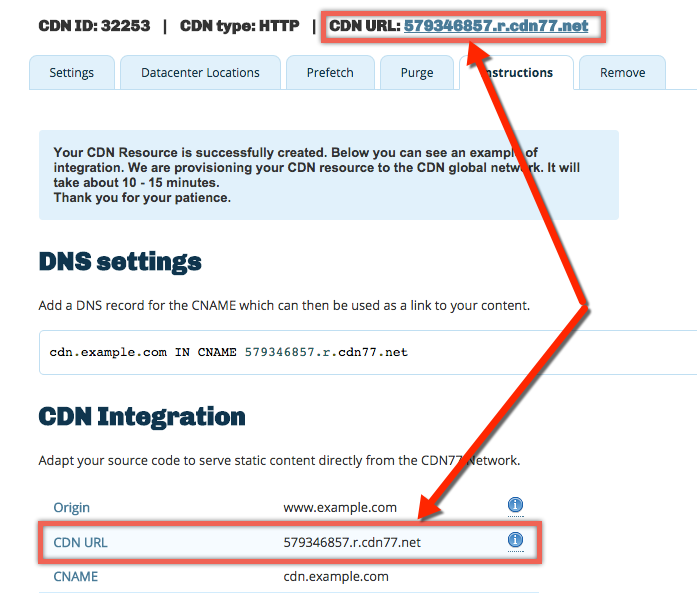
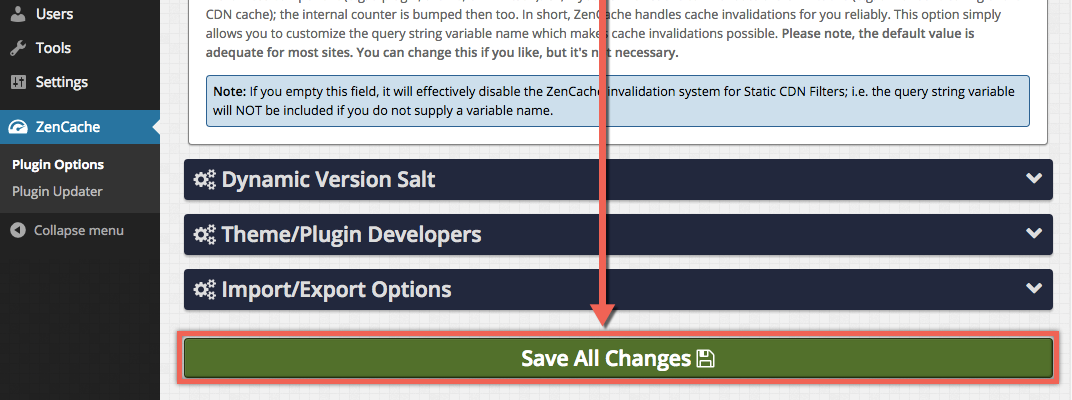
When you're finished, click the Save All Changes button at the bottom to save your Comet Cache configuration.
That's it! Comet Cache Pro is now configured with your CDN77 account. If you logout of your WordPress Dashboard and visit your site, you'll see that all static resources (CSS files, JavaScript files, images, etc.) are loaded with URLs that start with something like http://579346857.r.cdn77.net/, which indicates that the Comet Cache Pro CDN Integration is now working.
See Also: